

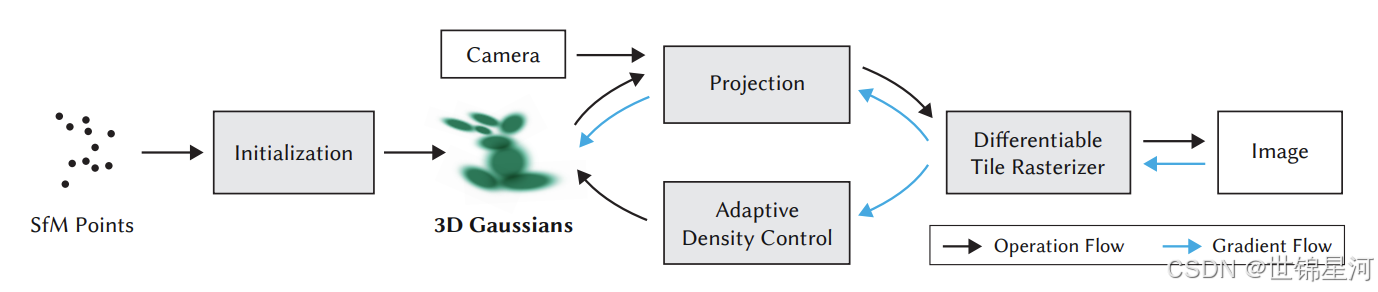
3D gaussian-splatting可视化SIBR_viewers在ubuntu20.04下的配置
本文承接于我的上篇3DGS在ubuntu下的环境配置:3D gaussian-splatting代码在ubuntu20.04 & CUDA11.8下的配置_3dgs cuda11.8-CSDN博客
更新
250325:增加多个优秀且易配置的GS可视化软件:3D gaussian-splatting可视化软件-CSDN博客
250301:安装opencv报ceres链接问题,找不到.h文件问题,增加多个SIBR链接问题
241122:是在远程服务器 或者 是在docker容器里面运行SIBR,显示GUI(图形用户界面)
参考&致谢
以下是我的参考文章,可能会对你们的问题有帮助,感谢他们:
【3DGS】Ubuntu20.04系统搭建3D Gaussian Splatting及可视化环境_ubuntu 3dgs安装-CSDN博客
Linux Ubuntu 20.04LTS安装OpenSSL步骤_ubuntu安装openssl-CSDN博客
ubuntu安装cmake的三种方法(超方便!)-CSDN博客
opencv编译与anaconda下lib冲突,屏蔽anaconda编译opencv_anaconda opencv冲突 lib-CSDN博客
在ubuntu下安装opencv4.1.0详细步骤_ubuntu22.04安装opencv4.10-CSDN博客
【已解决】Ubuntu 20.04 编译OpenCV 动态链接库指向版本不一致导致出错_ubuntu opencv ffi-CSDN博客
【已解决】ubuntu 16.04 源码编译opencv4.5.1 报错 “../../lib/libopencv_imgcodecs.so.4.5.0: undefined reference t”_ubuntu16.04 undefined reference to libfdt-CSDN博客
Ubuntu中安装openCV3.4.12编译过程中与Anaconda冲突_编译opencv-4.6之前我安装了anaconda3,系统库的路径被覆盖掉-CSDN博客
Linux Ubuntu 20.04LTS安装OpenSSL步骤_ubuntu安装openssl-CSDN博客
本文环境
my@test:~$ hostnamectl
Icon name: computer-desktop
Chassis: desktop
Operating System: Ubuntu 20.04.6 LTS
Kernel: Linux 5.15.0-117-generic
Architecture: x86-64
退出conda环境
建议退出conda环境,conda环境的libtiff.so等动态链接库可能会影响到opencv的安装
conda deactivate(base) my@test:~/下载$ conda deactivate
my@test:~/下载$
Ubuntu中安装openCV3.4.12编译过程中与Anaconda冲突_编译opencv-4.6之前我安装了anaconda3,系统库的路径被覆盖掉-CSDN博客
openssl的安装
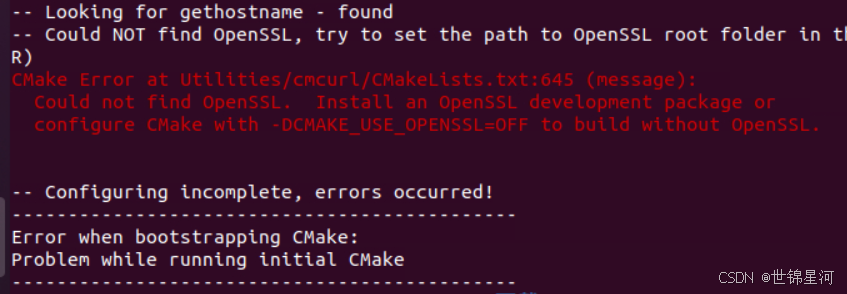
cmake的安装需要OpenSSL 的头文件和库文件,Ubuntu 20.04LTS 系统自带 OpenSSL ,但是这个OpenSSL 是没有<头文件.h>和<动态库文件.so及静态库文件.a>的,所以需要手动下载。
sudo apt-get install libssl-devmy@test:~/下载$ sudo apt-get install libssl-dev
正在读取软件包列表... 完成
正在分析软件包的依赖关系树
正在读取状态信息... 完成...
此方法会把OpenSSL的头文件放在 “/usr/include/openssl” ,动态库文件(libssl.so、libcrypto.so)、静态库文件(libssl.a、libcrypto.a)均放在 “/lib/x86_64-linux-gnu”
未下载OpenSSL头文件、库文件,cmake安装会报以下错误:Could not find OpenSSL
cmake的安装
1. cmake下载
Download CMake cmake网址
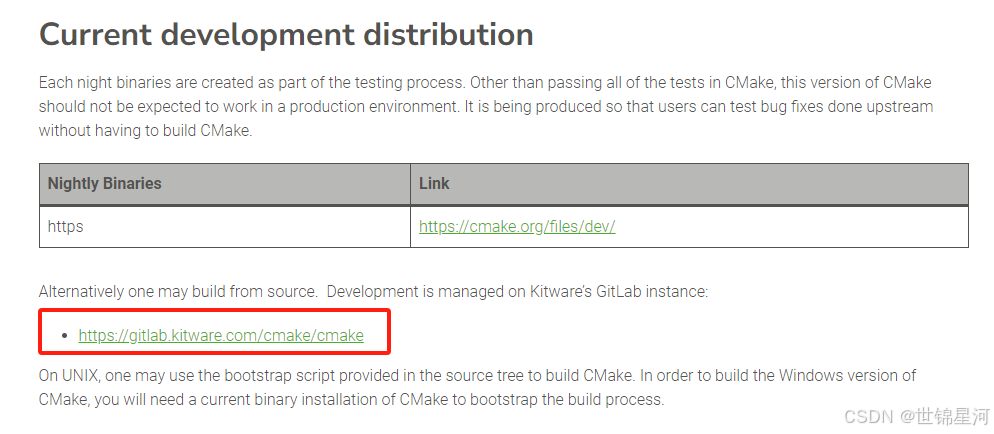
点击上述链接进入gitlab页面可下载cmake指定版本,以及可查看安装过程的指令CMake / CMake · GitLabCMake, the cross-platform, open-source build system.![]() https://gitlab.kitware.com/cmake/cmake
https://gitlab.kitware.com/cmake/cmake
本文使用cmake3.30.4 source源码版本
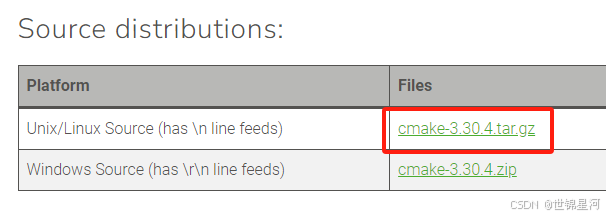
2. 解压
tar -xvzf cmake-3.30.4.tar.gzmy@test:~/下载$ tar -xvzf cmake-3.30.4.tar.gz
cmake-3.30.4/
cmake-3.30.4/.clang-format
cmake-3.30.4/.clang-tidy
cmake-3.30.4/Auxiliary/
cmake-3.30.4/Auxiliary/CMakeLists.txt
cmake-3.30.4/Auxiliary/bash-completion/...
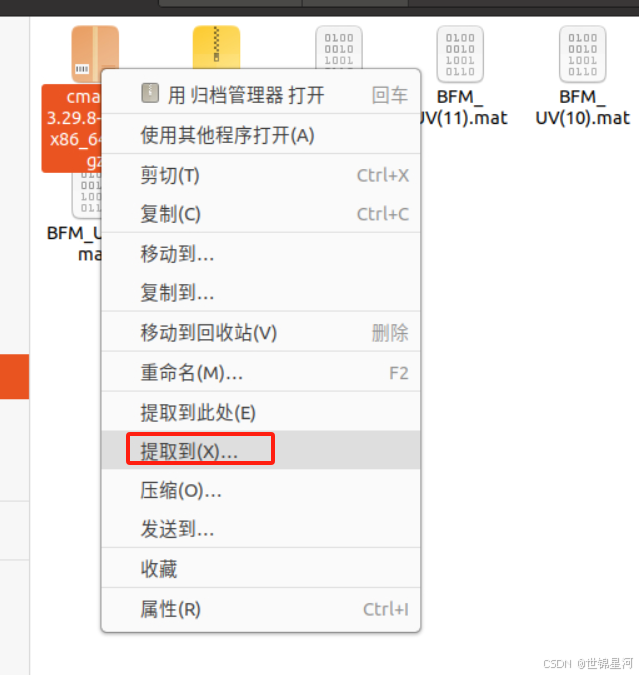
当然,如果是ubuntu桌面版,可以直接右击“提取到...”
3. 执行“文件检查&编译&安装”
cd cmake-3.30.4/
./bootstrap && make -j8 && sudo make install
my@test:~/下载$ cd cmake-3.30.4/
my@test:~/下载/cmake-3.30.4$ ./bootstrap && make -j8 && sudo make install
---------------------------------------------
CMake 3.30.4, Copyright 2000-2024 Kitware, Inc. and Contributors
Found GNU toolchain
C compiler on this system is: gcc
C++ compiler on this system is: g++
Makefile processor on this system is: make
g++ has setenv
g++ has unsetenv...
---------------------------------------------
CMake has bootstrapped. Now run make.
[ 0%] Building C object Source/kwsys/CMakeFiles/cmsys.dir/ProcessUNIX.c.o
[ 0%] Building C object Source/kwsys/CMakeFiles/cmsys.dir/Base64.c.o
[ 0%] Building C object Source/kwsys/CMakeFiles/cmsys.dir/EncodingC.c.o...
[ 1%] Built target cmsys
[ 2%] Built target cmsys_c
[ 3%] Built target cmsysTestsC
[ 3%] Built target testConsoleBufChild
cmake安装到了/usr/local/share/cmake-3.30路径
报错
CMake Error at /home/my/anaconda3/lib/cmake/Qt5Gui/Qt5GuiConfigExtras.cmake:9 (message):
Failed to find "GL/gl.h" in
"/home/my/anaconda3/include;/croot/qt-main_1693210824277/_build_env/x86_64-conda-linux-gnu/sysroot/usr/include;/croot/qt-main_1693210824277/_build_env/x86_64-conda-linux-gnu/sysroot/usr/include/libdrm;/croot/qt-main_1693210824277/_build_env/x86_64-conda-linux-gnu/sysroot/usr/include".
Call Stack (most recent call first):
/home/my/anaconda3/lib/cmake/Qt5Gui/Qt5GuiConfig.cmake:233 (include)
/home/my/anaconda3/lib/cmake/Qt5Widgets/Qt5WidgetsConfig.cmake:100 (find_package)
Tests/CMakeLists.txt:280 (find_package)
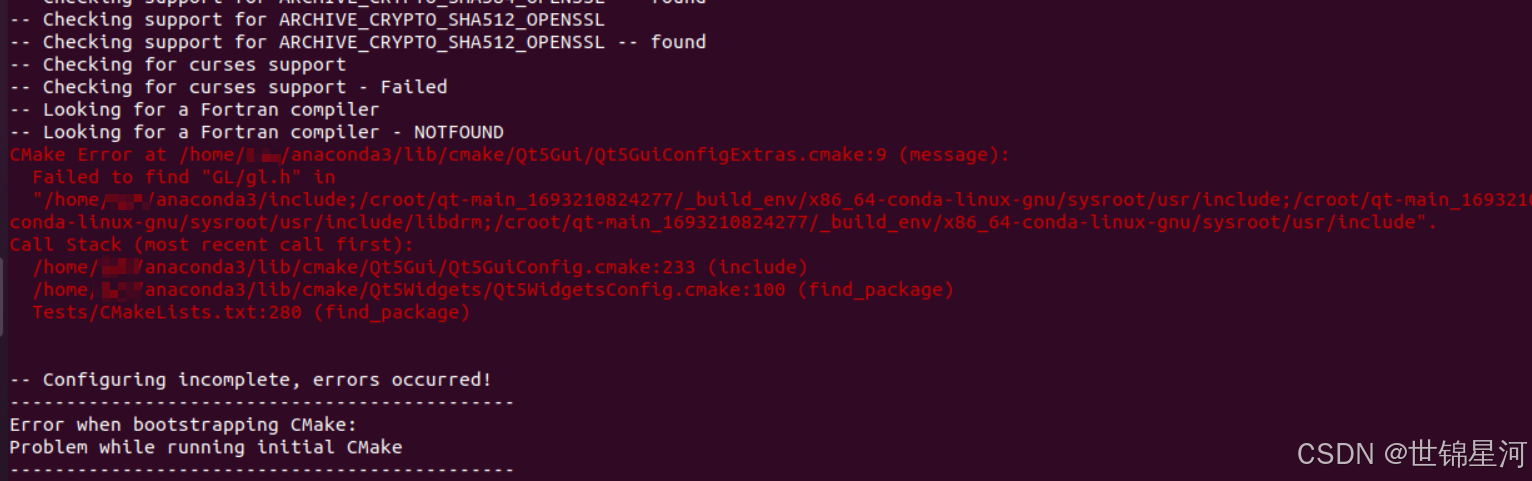
会看到链接动态库到anaconda了,是由于没退出anaconda base环境造成的,先conda deactivate,再删除CMakeCache.txt,重新./bootstrap && make -j8 && sudo make install
5. 软链接
sudo ln -sf /usr/local/bin/cmake /usr/bin/6. 验证版本
my@test:~/下载/cmake-3.30.4$ cmake --version
cmake version 3.30.4CMake suite maintained and supported by Kitware (kitware.com/cmake).
opencv的安装
1. 下载依赖
sudo apt-get install build-essential unzip pkg-config
sudo apt-get install libjpeg-dev libpng-dev libtiff-dev
sudo apt-get install libavcodec-dev libavformat-dev libswscale-dev libv4l-dev
sudo apt-get install libxvidcore-dev libx264-dev
sudo apt-get install libgtk-3-dev
sudo apt-get install libatlas-base-dev gfortran
sudo apt-get install python3-dev
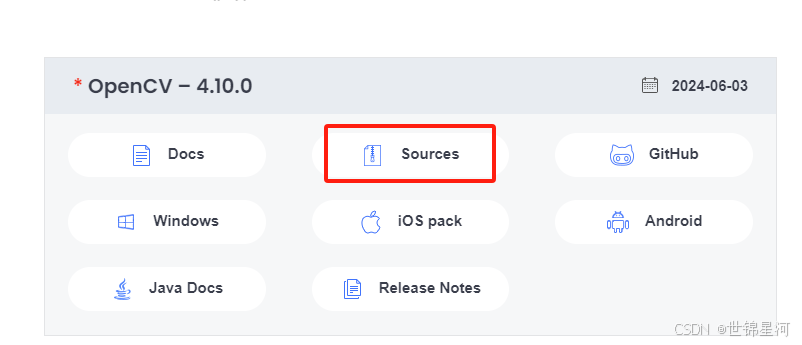
2. opencv下载
https://opencv.org/releases/ opencv下载
https://github.com/opencv/opencv_contrib/releases/tag/4.10.0 opencv_contrib下载
3. 解压
unzip opencv-4.10.0.zip
unzip opencv_contrib-4.10.0.zip
my@test:~/下载$ unzip opencv-4.10.0.zip
Archive: opencv-4.10.0.zip
71d3237a093b60a27601c20e9ee6c3e52154e8b1
creating: opencv-4.10.0/
inflating: opencv-4.10.0/.editorconfig...
当然,如果是ubuntu桌面版,可以直接右击“提取到...”
4.移动opencv_contrib
将opencv_contrib-4.10.0移到opencv-4.10.0文件夹下
5. cmake链接
cmake opencv_contrib-4.10.0会下载外网额外的组件,注意网速慢
cd opencv-4.10.0/
mkdir build
cd build

cmake -D CMAKE_BUILD_TYPE=Release -D OPENCV_EXTRA_MODULES_PATH=../opencv_contrib-4.10.0/modules ..
my@test:~/下载/opencv-4.10.0/build$ cmake -D CMAKE_BUILD_TYPE=Release -D OPENCV_EXTRA_MODULES_PATH=../opencv_contrib-4.10.0/modules ..
CMake Warning (dev) at CMakeLists.txt:127 (enable_language):
project() should be called prior to this enable_language() call.
This warning is for project developers. Use -Wno-dev to suppress it.-- The CXX compiler identification is GNU 9.4.0
-- The C compiler identification is GNU 9.4.0
-- Detecting CXX compiler ABI info
-- Detecting CXX compiler ABI info - done
-- Check for working CXX compiler: /bin/c++ - skipped
如果有报错信息如下:
CMake Error at CMakeLists.txt:10 (message):
FATAL: In-source builds are not allowed.
You should create a separate directory for build files.
-- Configuring incomplete, errors occurred!
则需要先删除cmake缓存
rm ../CMakeCache.txt6. 编译
make -j8my@test:~/下载/opencv-4.10.0/build$ make -j8
[ 0%] Built target opencv_videoio_plugins
[ 0%] Built target opencv_dnn_plugins
[ 0%] Built target opencv_highgui_plugins...
报错1

报错信息:
/usr/include/hdf5/openmpi/H5public.h:60:13: fatal error: mpi.h: 没有那个文件或目录
60 | # include
| ^~~~~~~
原因是找不到mpi.h文件,我的解决是修改opencv中的cmakelists.txt文件:
先find /usr -name "mpi.h",输出/usr/lib/x86_64-linux-gnu/openmpi/include/mpi.h
在cmakelists.txt文件加入
include_directories(/usr/lib/x86_64-linux-gnu/openmpi/include)
再删除build文件夹,重新cmake链接opencv
报错2
报错信息:
fatal error: openjpeg.h: No such file or directory
原因是找不到openjpeg文件,可以不同于报错1的方法,另一种解决方法是修改报错信息中给的.hpp文件:
先locate openjpeg.h,输出/usr/include/openjpeg-2.3/openjpeg.h
修改.hpp文件的引入
//#include
#include
报错3
/usr/lib/x86_64-linux-gnu/libopencv_imgcodecs.so.3.2.0: undefined reference to `TIFFReadDirectory@LIBTIFF_4.0'
//usr/lib/libgdal.so.20: undefined reference to `TIFFLastDirectory@LIBTIFF_4.0'
/usr/lib/x86_64-linux-gnu/libopencv_imgcodecs.so.3.2.0: undefined reference to `TIFFWriteEncodedStrip@LIBTIFF_4.0'
/usr/lib/x86_64-linux-gnu/libopencv_imgcodecs.so.3.2.0: undefined reference to `TIFFIsTiled@LIBTIFF_4.0'
//usr/lib/libgdal.so.20: undefined reference to `TIFFSwabArrayOfShort@LIBTIFF_4.0'
在确保libtiff-dev已安装的情况下,sudo apt-get install libtiff4-dev
cmake指令增加 -D BUILD_TIFF=ON(以前写的)
确保conda环境已退出,conda deactivate,避免conda影响
报错4
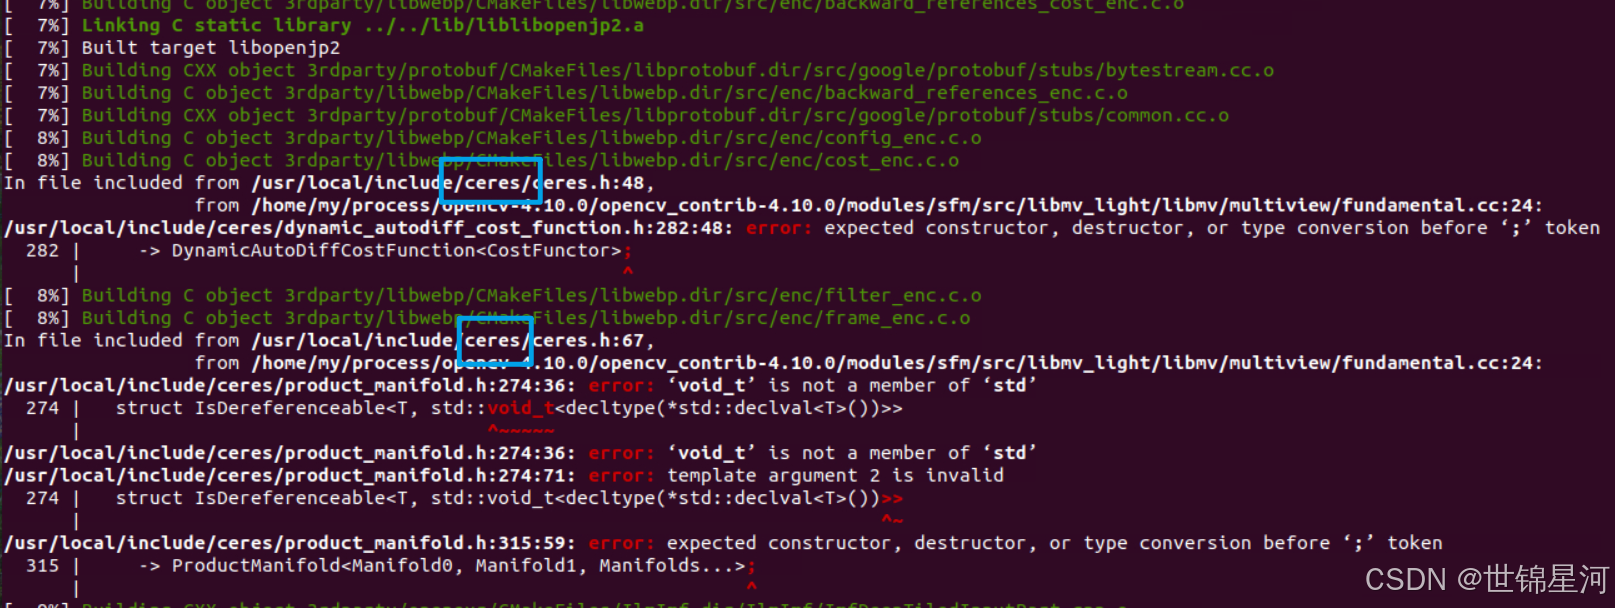
[ 8%] Building C object 3rdparty/libwebp/CMakeFiles/libwebp.dir/src/enc/cost_enc.c.o
In file included from /usr/local/include/ceres/ceres.h:48,
from /home/my/process/opencv-4.10.0/opencv_contrib-4.10.0/modules/sfm/src/libmv_light/libmv/multiview/fundamental.cc:24:
/usr/local/include/ceres/dynamic_autodiff_cost_function.h:282:48: error: expected constructor, destructor, or type conversion before ‘;’ token
282 | -> DynamicAutoDiffCostFunction;
|
说是链接ceres问题,直接卸载ceres
sudo rm -rf /usr/local/lib/cmake/Ceres /usr/local/include/ceres /usr/local/lib/libceres.a7. 安装opencv
sudo make installmy@test:~/下载/opencv-4.10.0/build$ sudo make install
[ 0%] Built target opencv_dnn_plugins
[ 0%] Built target opencv_highgui_plugins
[ 2%] Built target libopenjp2
[ 2%] Built target opencv_videoio_plugins...
Install the project...
-- Install configuration: "Release"
-- Installing: /usr/local/share/licenses/opencv4/ippicv-readme.htm
SIBR_viewers的安装
GitHub - graphdeco-inria/gaussian-splatting: Original reference implementation of "3D Gaussian Splatting for Real-Time Radiance Field Rendering"
gs谈到了SIBR的安装,但是我的安装过程有报错
1. 依赖安装
sudo apt install -y libglew-dev libassimp-dev libboost-all-dev libgtk-3-dev libopencv-dev libglfw3-dev libavdevice-dev libavcodec-dev libeigen3-dev libxxf86vm-dev libembree-devmy@test:~/postg/thesis/gaussian-splatting/SIBR_viewers$ sudo apt install -y libglew-dev libassimp-dev libboost-all-dev libgtk-3-dev libopencv-dev libglfw3-dev libavdevice-dev libavcodec-dev libeigen3-dev libxxf86vm-dev libembree-dev
正在读取软件包列表... 完成
正在分析软件包的依赖关系树
正在读取状态信息... 完成
2. 切换SIBR的分支
如果是ubuntu20.04,还需要切换SIBR的分支,如果是ubuntu22.04则不需要
cd SIBR_viewers
git checkout fossa_compatibility
my@test:~/postg/thesis/gaussian-splatting/SIBR_viewers$ git checkout fossa_compatibility
M CMakeLists.txt
M src/projects/remote/CMakeLists.txt
已经位于 'fossa_compatibility'
您的分支与上游分支 'origin/fossa_compatibility' 一致。
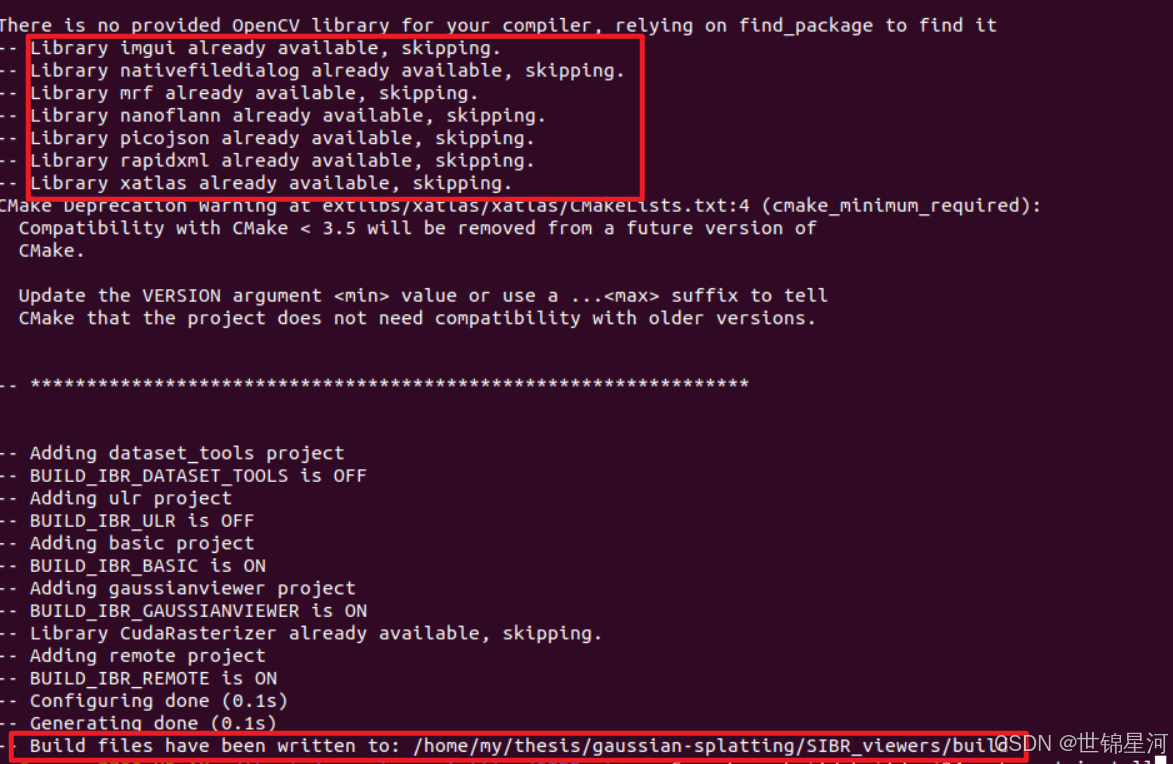
3. cmake链接
cmake -Bbuild . -DCMAKE_BUILD_TYPE=Release链接成功图
报错1
中途可能卡顿,是因为在下载其他依赖组件。我的解决方法是换一个cmake版本(比如使用sudo apt-get install cmake),就成功了
--Populating library imgui...
报错2
报错信息:
CMake Error in src/core/system/CMakeLists.txt:
Imported target "Boost::system" includes non-existent path"/include"
in its INTERFACE_INCLUDE_DIRECTORIES. Possible reasons include:
* The path was deleted, renamed, or moved to another location.
* An install or uninstall procedure did not complete successfully.
* The installation package was faulty and references files it does not
provide.”
直接有效的解决方法是创建/include文件夹,并将boot文件夹复制到include文件夹下
locate boost/version.hpp ##定位boost文件夹,我的boost文件是在 /usr/include/boost
sudo mkdir /include
sudo cp -r /usr/include/boost/ /include/ ##复制文件夹
报错3
CMake Error at cmake/linux/dependencies.cmake:284 (find_package):
By not providing "Findglfw3.cmake" in CMAKE_MODULE_PATH this project has
asked CMake to find a package configuration file provided by "glfw3", but
CMake did not find one.Could not find a package configuration file provided by "glfw3" with any of
the following names:glfw3Config.cmake
glfw3-config.cmake
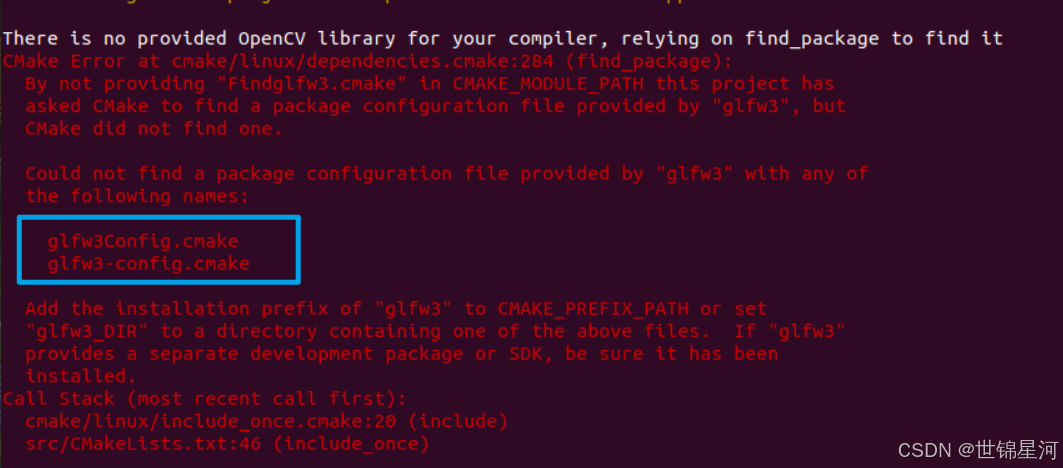
解决方法:
sudo apt update
sudo apt install libglfw3-dev  # 安装 GLFW3 开发包
报错4
CMake Error: The following variables are used in this project, but they are set to NOTFOUND.
Please set them or make sure they are set and tested correctly in the CMake files:
FFMPEG_LIBAVDEVICE_LIBRARIES
linked by target "sibr_video" in directory /home/my/thesis/gaussian-splatting/SIBR_viewers/src/core/video-- Generating done (0.1s)
CMake Generate step failed. Build files cannot be regenerated correctly.
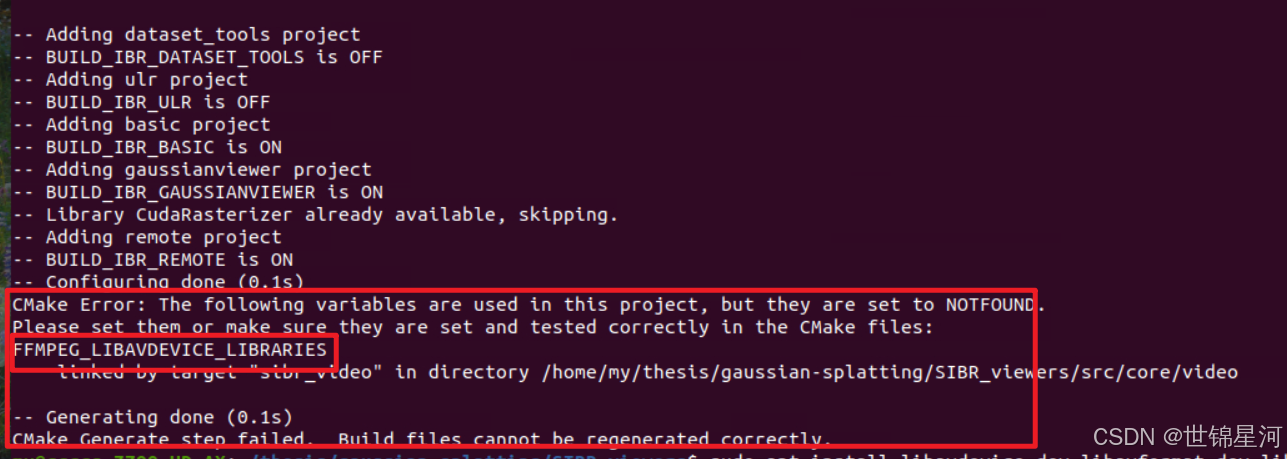
解决方法
sudo apt update
sudo apt install libavdevice-dev libavformat-dev libavcodec-dev libswscale-dev libavutil-dev
4. 编译安装
cmake --build build -j24 --target install报错1
报错信息:
In file included from /home/my/postg/thesis/gaussian-splatting/SIBR_viewers/src/./core/graphics/Utils.hpp:15,
from /home/my/postg/thesis/gaussian-splatting/SIBR_viewers/src/core/graphics/Utils.cpp:14:
/home/my/postg/thesis/gaussian-splatting/SIBR_viewers/src/./core/graphics/Config.hpp:29:12: fatal error: opencv2/opencv.hpp: 没有那个文件或目录
29 | # include
| ^~~~~~~~~~~~~~~~~~~~
compilation terminated.
解决方法:c++ 中——fatal error: opencv2/opencv.hpp: No such file or directory #include <opencv2/opencv.hpp>_opencv2: no such file or directory #include [ 35%] Linking CXX shared library libsibr_graphics.so /home/my/thesis/gaussian-splatting/SIBR_viewers/src/core/raycaster/Raycaster.hpp:17:12: fatal error: embree3/rtcore_ray.h: 没有那个文件或目录
/bin/ld: 找不到 -lembree3
至此,SIBR安装完毕 将3D gaussian-splatting代码在ubuntu20.04 & CUDA11.8下的配置_3d gaussian splatting 环境搭建 ubuntu-CSDN博客 中的训练结果运行,训练结果的目录结构如下: my@test:~/postg/thesis/gaussian-splatting/data$ tree output 4 directories, 5 files 报错信息: my@test:~/thesis/gaussian-splatting/SIBR_viewers/install/bin$ ./SIBR_gaussianViewer_app -m /home/my/thesis/gaussian-splatting/output/
./SIBR_gaussianViewer_app: error while loading shared libraries: libwebp.so.7: cannot open shared object file: No such file or directory (1)查看依赖的动态链接库,发现部分没链接上 my@test:~/thesis/gaussian-splatting/SIBR_viewers/install/bin$ ldd ./SIBR_gaussianViewer_app
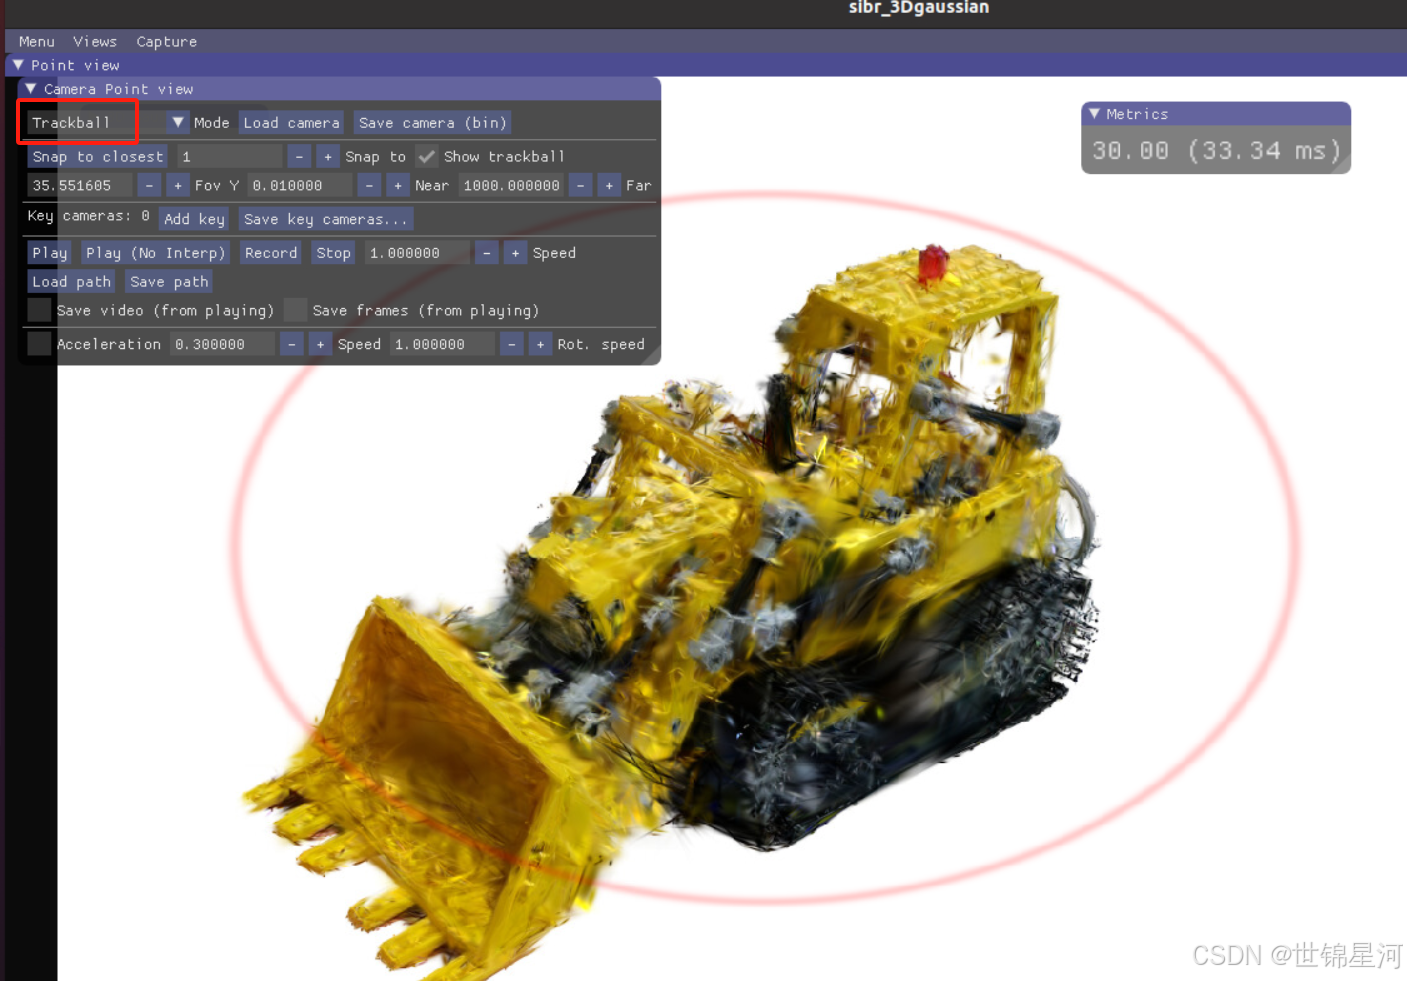
libwebp.so.7 => not found (2)手动创建链接,先找到动态链接库,如果没有就sudo apt-get install ... my@test:~/thesis/gaussian-splatting/SIBR_viewers/install/bin$ locate libwebp.so.7 /home/my/anaconda3/lib/libwebp.so.7 (3)然后将.so复制到lib中 my@test:~/thesis/gaussian-splatting/SIBR_viewers/install/bin$ cp /home/my/anaconda3/lib/libwebp.so.7 /home/my/thesis/gaussian-splatting/SIBR_viewers/install/lib/ (4)再调用 ldd ./SIBR_gaussianViewer_app 查看动态库是否链接上 报错信息: my@test:~/thesis/gaussian-splatting/SIBR_viewers/install/bin$ ./SIBR_gaussianViewer_app -m /home/my/thesis/gaussian-splatting/data/output/ ./SIBR_gaussianViewer_app: /usr/local/lib/libtiff.so.5: no version information available (required by /lib/x86_64-linux-gnu/libopencv_imgcodecs.so.4.2) (1)是因为OpenGL的版本问题,解决如下,查看OpenGL的版本: my@test:~/thesis/gaussian-splatting/SIBR_viewers/install/bin$ glxinfo | grep OpenGL 其中OpenGL core profile version string: 4.5,则直接指令带上MESA_GL_VERSION_OVERRIDE=4.5即可 File not found: uv_mesh.vert 有些人是 1. 连接的远程ubuntu服务器(想在本机显示GUI); 2. 是远程ubuntu服务器不是桌面版,只有bash窗口; 3. docker容器里运行。 参考以下文章。 解决qt.qpa.xcb: could not connect to display问题-CSDN博客 Docker容器内的图形显示到宿主机屏幕报错 Gtk-WARNING **: cannot open display: unix:0 解决-CSDN博客 方法: 方法1:是远程ubuntu桌面版的,直接在远程桌面运行SIBR 方法2:在本机下载mobaxterm,然后在mobaxterm里面敲命令运行,(也可以结合pycharm,注意保证ssh软件和pycharm同时开启)。在MobaXterm看可视化(因为是远程),帧率会很低。 至于如何用本机pycharm运行远程服务器环境,以后再写篇文章。 键位:qweasd控制平移,uiojkl控制旋转 q下,e上,w前进,s后退 选择trackball,可以用鼠标进行旋转
这个ubuntu环境下的可视化配置耗费我很多时间,直接在windows上可视化更方便,也早已实现。我也深刻理解了奥卡姆剃刀原则--“如无必要,勿增实体”,谨记。报错2
/bin/ld: 找不到 -lXxf86vm
collect2: error: ld returned 1 exit status
make[2]: *** [src/core/graphics/CMakeFiles/sibr_graphics.dir/build.make:416:src/core/graphics/libsibr_graphics.so] 错误 1
make[1]: *** [CMakeFiles/Makefile2:909:src/core/graphics/CMakeFiles/sibr_graphics.dir/all] 错误 2
make: *** [Makefile:136:all] 错误 2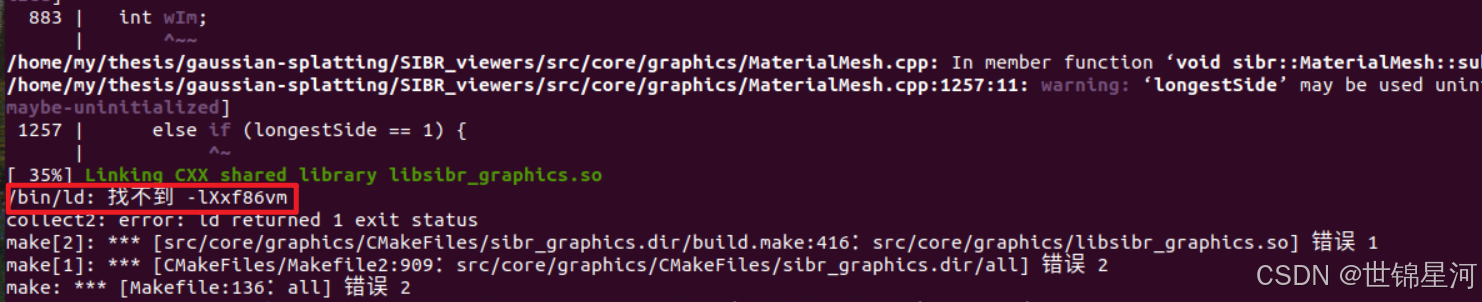
sudo apt update
sudo apt install libxxf86vm-dev  # 包含 libXxf86vm.so
报错3
17 | # include 
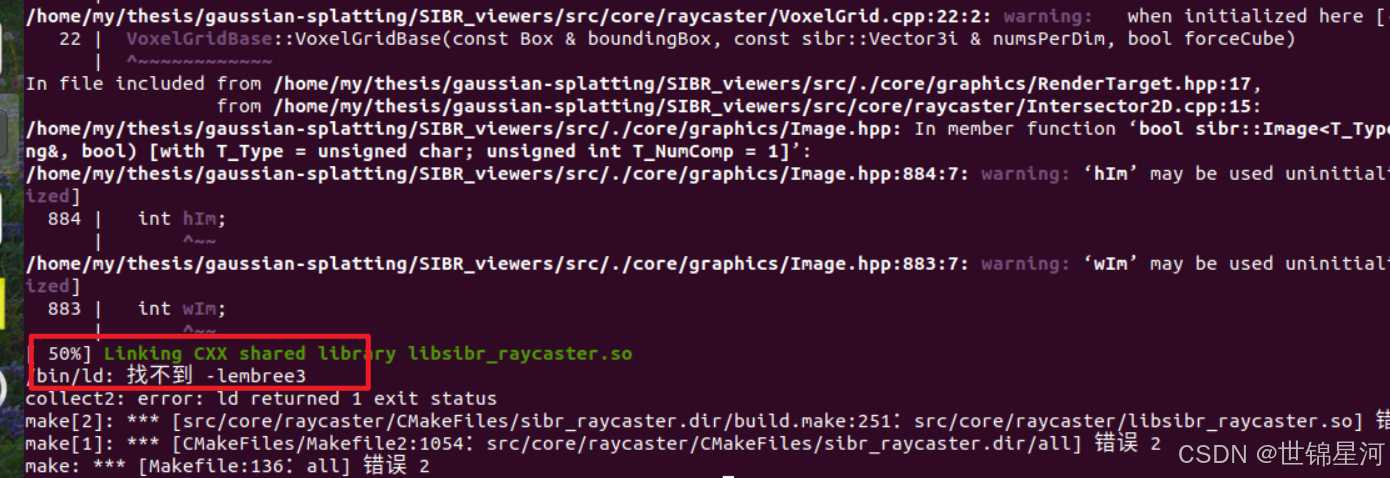
sudo apt-get install libembree-devSIBR运行
output
├── cameras.json
├── cfg_args
├── input.ply
└── point_cloud
├── iteration_30000
│ └── point_cloud.ply
└── iteration_7000
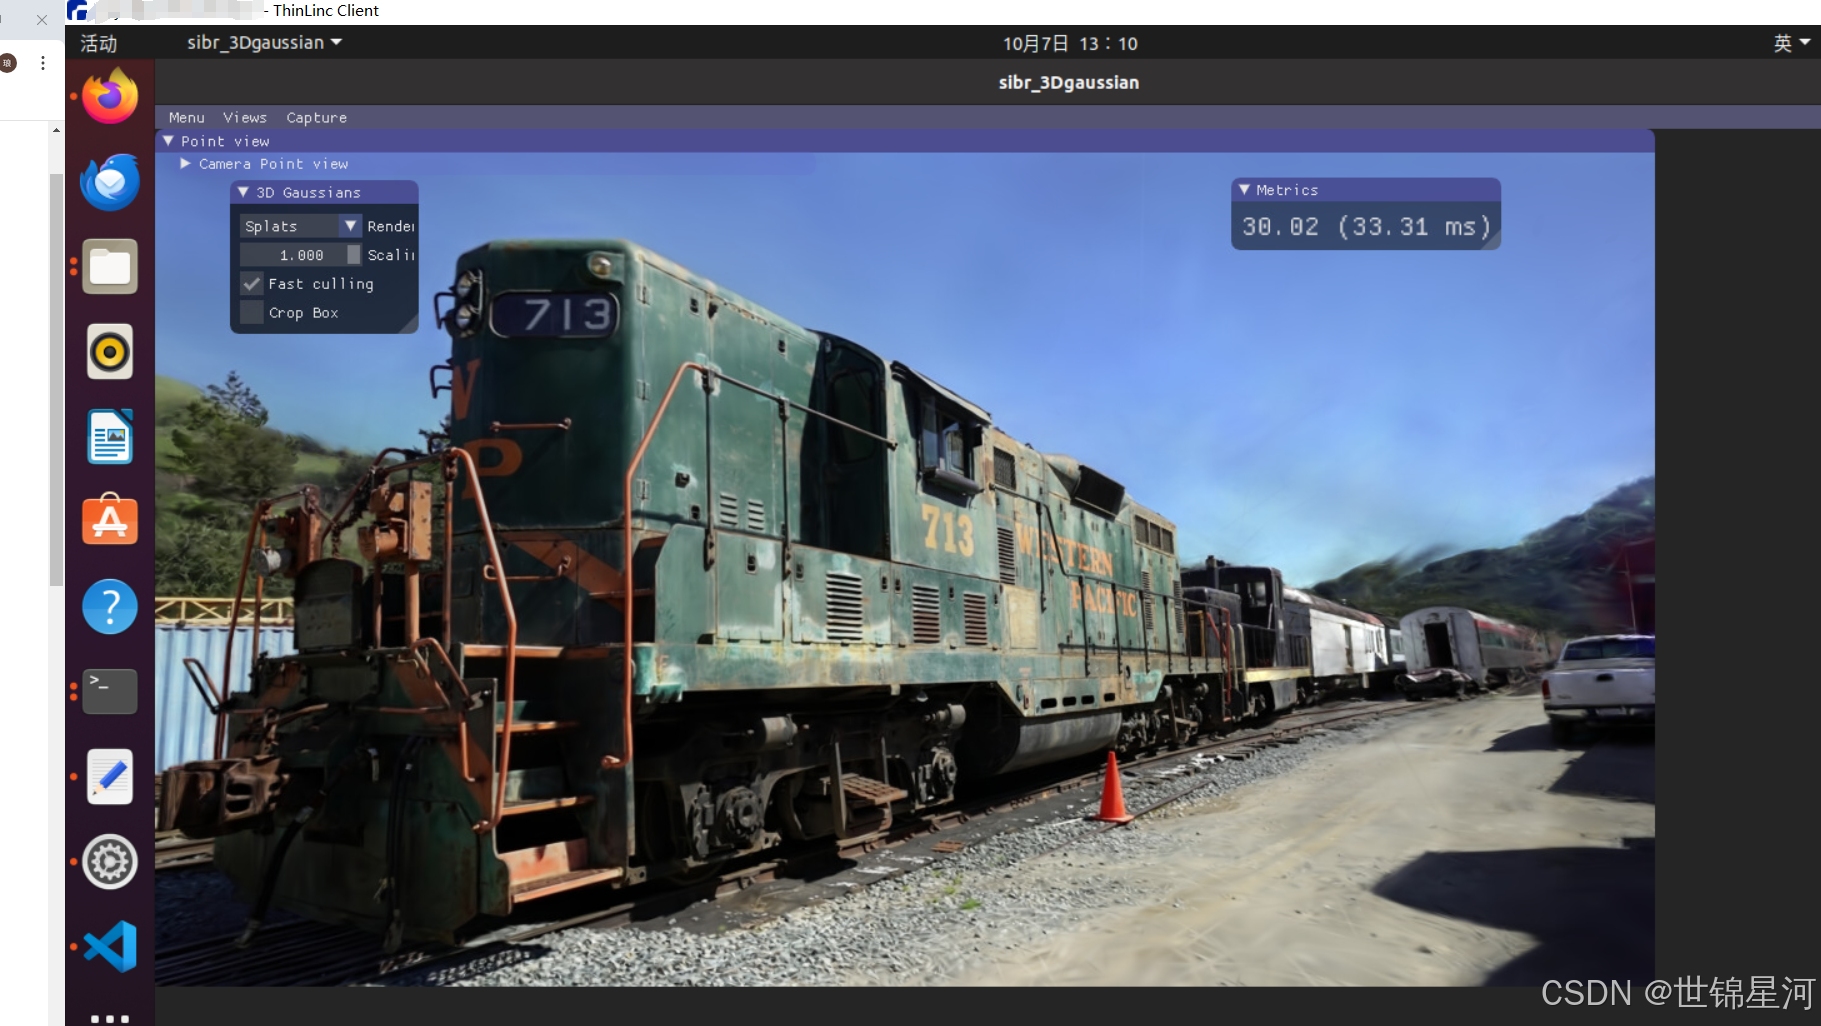
└── point_cloud.ply1. 运行SIBR
cd install/bin
./SIBR_gaussianViewer_app -m /home/my/thesis/gaussian-splatting/data/output/
报错1
ldd ./SIBR_gaussianViewer_app
libLerc.so => not found
libjpeg.so.9 => not found
libdeflate.so.0 => not found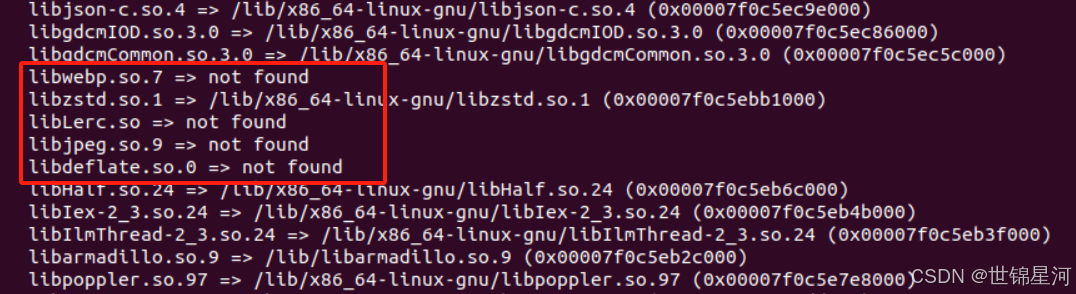
locate libwebp.so.7
cp /home/my/anaconda3/lib/libwebp.so.7 /home/my/thesis/gaussian-splatting/SIBR_viewers/install/lib/
报错2
./SIBR_gaussianViewer_app: /usr/local/lib/libtiff.so.5: no version information available (required by /lib/libgdal.so.26)
./SIBR_gaussianViewer_app: /usr/local/lib/libtiff.so.5: no version information available (required by /lib/x86_64-linux-gnu/libpoppler.so.97)
./SIBR_gaussianViewer_app: /usr/local/lib/libtiff.so.5: no version information available (required by /lib/x86_64-linux-gnu/libgeotiff.so.5)
[SIBR] -- INFOS --: Initialization of GLFW
[SIBR] ## ERROR ##: FILE /home/my/thesis/gaussian-splatting/SIBR_viewers/src/core/graphics/Window.cpp
LINE 30, FUNC glfwErrorCallback
GLX: Failed to create context: GLXBadFBConfig
terminate called after throwing an instance of 'std::runtime_error'
what(): See log for message errors
已放弃 (核心已转储)sudo apt install mesa-utils -y
glxinfo | grep OpenGL
OpenGL vendor string: Mesa/X.org
OpenGL renderer string: llvmpipe (LLVM 12.0.0, 256 bits)
OpenGL core profile version string: 4.5 (Core Profile) Mesa 21.2.6
OpenGL core profile shading language version string: 4.50
OpenGL core profile context flags: (none)
OpenGL core profile profile mask: core profile
OpenGL core profile extensions:
OpenGL version string: 3.1 Mesa 21.2.6
OpenGL shading language version string: 1.40
OpenGL context flags: (none)
OpenGL extensions:
OpenGL ES profile version string: OpenGL ES 3.2 Mesa 21.2.6
OpenGL ES profile shading language version string: OpenGL ES GLSL ES 3.20
OpenGL ES profile extensions:MESA_GL_VERSION_OVERRIDE=4.5 ./SIBR_gaussianViewer_app -m /home/my/thesis/gaussian-splatting/output/报错3
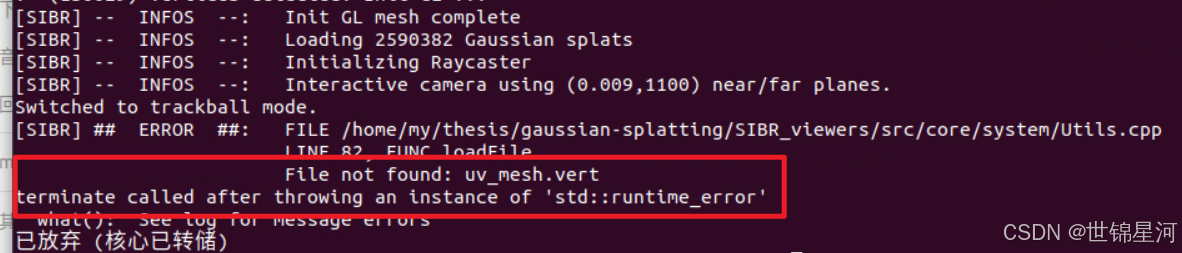
先cd到~/thesis/gaussian-splatting/SIBR_viewers/install/shaders/core,
能找到uv_mesh.vert,
然后
MESA_GL_VERSION_OVERRIDE=4.5 ~/thesis/gaussian-splatting/SIBR_viewers/install/bin/SIBR_gaussianViewer_app -m /home/my/thesis/gaussian-splatting/data/output/truck
是在远程服务器 或者 是在docker容器里面运行SIBR
可视化结果